A fairly simple DIY you can do for custom-looking shelving.
Your first step is to determine how many shelves you need and what dimensions you'd like them to be.
For my laundry closet project, I needed 2 shelves total, with the top measuring larger than the bottom.
I purchased these Project Panel boards at Lowes. They are offered in a variety of lengths & widths.
I chose the 16in deep x 6ft long & 12in deep x 4ft long since there were closest to the sizes I needed.
I recommend these boards for several reasons - the pre-cut sizes are easy to manage, they come wrapped in plastic so the wood is clean & the boards are very straight so you don't have to spend time sorting through lumber.
I purchased two of each size (you will need two so you can double the boards to give the thicker appearance).
Since these weren't the exact measurements I needed, I had to cut them down using the table saw. If you don't have access to one, you can get boards cut for you at Lowes.
I cut both sets down lengthwise. The 16in boards to 14in deep and the 12in boards to 10in deep.
Once the boards are the dimension you need, you can begin assembling.
I joined the two boards together using a combination of wood glue & screws.
Add the wood glue to one of the boards, then 'sandwich' them together. Use clamps around the edges to hold the boards in place while you screw them together.
I pre-drilled the holes to make screwing them together easier.
Tip - set the drill bit at a length that won't go all the way thru the boards. Remember to select screws that aren't too long for the same reason.
I sunk the screws in below the surface of the wood so I could fill with spackle to conceal them once the shelves were painted.
Once the boards are joined together and the glue has had time to dry, you can add the edge banding.
The finish result will give you the illusion of 1 1/2 inch thick boards - it's magic!
First measure and pre-cut the banding into the lengths needed. To apply the banding, you will need a hot iron and steady hand. Work slowly to make sure you melt the adhesion and have things aligned correctly.
I only banded the front and two sides since the back will be against the wall.
The 2" edge banding is slightly larger than the two boards combined, so to fix that I used a razor blade to cut off any excess material. You don't have to cut thru the banding completely - just run the blade to score the material and it will snap when you bend it.
After the banding has been adhered and trimmed down, sand down the edges to smooth any splintering and soften the edges.
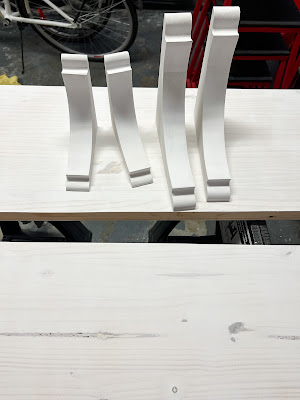
Now that the shelves are constructed you can finish them how you choose. For this project I opted for paint, so first step was to get a coat of primer on the corbels and shelves.
I selected 'Cabinet & Door' paint for the shelves. It's a durable semi-gloss finish that is made for higher wear areas. I knew I would be sliding baskets on/off these shelves so I wanted a paint that would hold up against that.
I used a foam roller to apply the paint, which helped give an even finish. I ended up applying two coats.
Once the paint (or stain) is dry, it's time to install!
I started with the bottom shelf first since I knew the height it needed to be to allow clearance for the top-load washer to open. I spaced the corbels out based on the shelf length & where I found studs.
After the corbels are installed, the shelf can be put into place. For extra support, drill/nail the shelf into the corbels. I kept mine free-floating considering the weight but may decide to add later if they shift around.
With the bottom shelf set, I could now determine where the top shelf would finish. You will need to consider what you will be placing on the shelves to make sure you have enough room between the two.
For my project, I needed to account for laundry detergent bottles, so I decided on 15 inches between the two.
Repeat the same steps you did to install the first shelf for the remainder.
And there you have it - custom shelving!
These turned out to be much easier than expected, the hardest part is having to wait for the paint to dry!
I would recommend this project for anywhere you'd like to add attractive yet functional shelving - open kitchen shelves, bathroom storage, or office displays.
I would recommend this project for anywhere you'd like to add attractive yet functional shelving - open kitchen shelves, bathroom storage, or office displays.
To see the shelves styled & organized, you can check out my Laundry Room - Reveal post.
MATERIALS:


Post a Comment